Whimsical Twist Design Team
I'm Super excited to have been chosen to be a part of the Whimsical Twist Design Team. This is the first Design Team I have been in and I feel honored to have been selected. Please follow along on the Whimsical Twist blog and visit this Sweet little online Scrapbook Store. Kimmie has a lot of Scrapbook treasure there and her shipping is really reasonable.
http://whimsicaltwist.com/blog/
Happy Scrappin'
Carrie
How I created my Title
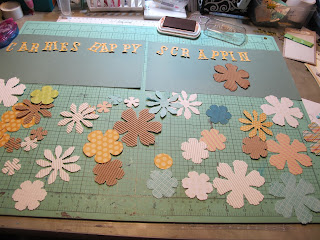
I just wanted to show you how I created my Happy Scrappin' Title
First I cut out the Happy Scrappin' letters with my Cricut machine. I used the StoryBook Cricut cartridge. I cut the letters at 1.25" and then inked them with chestnut roan chalk ink. I glued them to my hand cut white corrugated pennants creating a banner.
To create all my layered flowers I cut multiple patterned papers from MME's Collectable "Notable" line. I also cut some natural and white corrugated paper layers. I used my Sizzix Big Shot Machine with the Tim Holtz Tattered Floral Die. I love this die, as you get four different size floral layers.
Then using my Chestnut Roan chalk ink I inked all the flowers. I also dry embossed some of the flower petals and hand cut some leaves. I layered them together attaching with glue dots to create multiple layered 3D flowers. I added enamel dots to the centers of some of the flowers. These too are from the MME Collectable line.
To complete my Title layout I used my Kiwi Lane scallop border to cut two borders and then I layered all my pieces together. I added the 3D flowers and attached my banner with bakers twine. I then added a sweet wood veneer bird to finish off my project.
Thanks for visiting my blog. I hope you found some inspiration along the way. Please leave me a comment telling me what you think. Be nice this is my first attempt at blogging. I will choose one random comment on Saturday Aug. 3rd to win a little prize pack ( pictured below )
Happy Scrappin'
Carrie
Just getting started
Subscribe to:
Comments (Atom)


