a Jar full of Stars

Today I am sharing with you a quick project life card I created using the "Not Too Shabby" stamp set from #HoneyBeeScraps.  


 I wanted to create a few PL cards to use in my project life album with photos taken over the summer. This one will be a journal card to document one of our summer night adventures.  I chose to use this sweet little jar and the tiny stars from this set to create this card. I heat embossed the jar and then added a sprinkling of stars as if they were trapped inside. I also add a few stars floating above.
I then added the "SWEET LITTLE moments" sentiment to a tiny tag. The entire card has been inked in Mustard Seed Distress ink  and I highlighted the stars and edges with the Wink of Stella clear sparkle ink. I also used the silver Wink of Stella brush pen to color the jar lid.


High Quality clear stamps are a great way to make a few quick PL cards to have on hand for future scrapbook projects.  Pick up a few of your own from the HoneyBeeScrap shop  today.

Happy Scrappin'
Carrie

FLAIRTASTIC FRIDAY

 Happy Friday! Do you love #TheCraftyPickle flair as much as I do?  Well, if so you need to check back every Friday to TheCraftyPickle blog to see all the Flairtastic projects we, the design team, are sharing.  We will show you Flairtastic ideas for using your flair in lots of fun crafty project. 

Here is what I created for this Flairtastic Friday post.  Gift card holders. 
These cute pockets are from Simple Stories. They are pre-made card stock pockets that I embellished to have on hand for up coming Birthday gifts.

 This is for a special little girl. The adorable purple hippo is my favorite in the "Cute Animal" flair set
Any coffee lover in your life would love this Starbucks gift card, right?  I used a couple of flair from the "Coffee Theme" set to embellish this card.

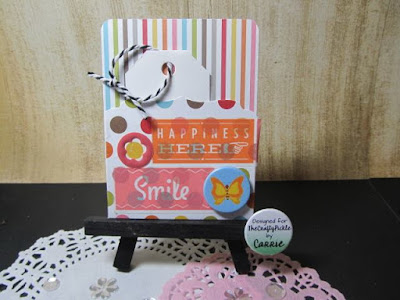
My last card is a tag holder that I created to have on had to use a gift tag the next time I need to wrap a gift, I can personalize the tag to suit any occasion. 

I Hope you enjoyed these projects today, remember to stop by TheCraftyPickle blog to see all the other Flairtastic ones too. 

Until next time, 
Happy Scrappin'
Carrie

Happy Day Card Featuring Color Pop Flair


Hi Carrie here to share with you today a fun Birthday card I created using some of my favorite flair embellishments from #TheCraftyPickle


The flair I used is from the Color Pop line from The Crafty Pickle.  There are nine different sets of Color Pop flair in a rainbow of colors.  These flair embellishments are the perfect embellishment for any layout, card or crafty project.  I just love how versatile they are. 

I started with a cut out banner card. I traced out the banner with a pencil then stamped HAPPY into each banner
Then I colored in each banner with my Spectrum Noir color pencils in a rainbow pattern. 


To Create my Balloon bouquet I used my Ranger circle blending tool and Distress ink The colors I used are spun sugar, spiced marmalade, tumbled glass, mustard seed and mowed lawn.

I added some twine to the back of my flair buttons with 3D foam squares. Then I clustered my flair in a Balloon Bouquet tied with a bow.  I think my card came out super cute.


Be sure to pop over the TheCraftyPickle shop and pick up some Color Pop flair for your next Crafty project.

Thanks for stopping by today. 
Happy Scrappin'
Carrie

Watercolor window card

Hi it's Monday again and today I am sharing with you a pretty watercolor window card I created using two of my favorite images from two different #HoneyBeeScrap stamp sets.

 The floral bunch stamp is from the "Not too Shabby" stamp set.  I love outline stamps cause you can color them in with any medium you choose.  Today I chose to use my watercolors. 
 The first thing I did was to create the window in my card base by using one of my circle DYI steel dies by Technique Tuesday and running it through my Sizzix Big Shot machine.
 I placed a scrap piece of paper inside the card and stamps my floral bunch around the outside of the circle. This created a wreath pattern around my "window".  I then used my Kuretake Gansai Tambi watercolors and painted my flower wreath.  To complete my card I stamped my sentiment from the HoneyBeeScraps stamp set "Oh, Snap!"  - You're Pretty Much My Most Favorite of All Time in the History of EVER.  I added the sheer orange bow to finish it off.


Be sure and check out the #HoneyBeeScraps shop to pick up your own highest quality 100% Photopolymer stamp sets. You'll be glad you did. 

Happy Scrappin'
Carrie

A Quick Birthday card using TCP flair

Good Morning Happy Scrappers. 

Today I am going to share with you a quick Birthday card I created using a beautiful watercolor Butterfly flair from #TheCraftyPickle Etsy shop

I love creating my own backgrounds using Adirondack alcohol inks 
First thing I did was to squirt two colors of the alcohol ink onto my splat mat and then add some blending solution. This helps to spread the ink around.  Then I just laid my glossy card stock right on top of the ink. 
I love the watercolor affect this technique creates. 


Once my card base was dry I stenciled some white clouds and then stamped my Happy Birthday sentiment by Technique Tuesday

To complete my card I layered some pretty pattern papers onto my card base, added my beautiful Butterfly flair and tied some silver floss around the center. 

 Crafty Pickle flair is the perfect embellishment for beautiful greeting cards.  Be sure and stop by The Crafty Pickle Etsy shop
and grab some today. 

Happy Scrappin'
Carrie 


Crafting with Carrie - Happy Dad's day card

 Good morning ladies.  Today I am sharing a Father's day card I created featuring the #HoneyBeeScraps stamp set "Oh Snap"  and my favorite Ranger Distress Re-inkers


To create this card I started with a 4x6 sheet of Mixed Media paper Spritzed with water. Using an arrow stencil and a simple cosmetic sponge I dabbed three different colors of Distress ink to my wet paper.  I flipped my stencil and repeated the design several times on my card. 


 Since my paper was still wet the ink ran down my card. You can still see the shape of the arrow with the "bleeding" ink. 
I then took a baby wipe and dabbed my card to spread the ink over my card. This also helps to soak up the excess ink.
 Once my card was dry I then re-stenciled my arrows for a more concentrated look.
After my card was dry again. I stamped my sentiment from the "OH Snap" Stamp set. I love you more. To embellish my card I stamped the mini chevron as arrows pointing to my sentiment and  I scattered some of the tiny hears around too.

In my house we always say Happy Dad's Day! So I added that title with some mini Kraft sticker letters.
I Really love the Distress look of my card and I am sure my Father In-law will love it too.

Thanks for stopping by today
Happy Scrappin'
Carrie

Creating with Custom flair from TCP


Carrie here to share with you some pretty fun projects I created using some custom flair that I ordered from #TheCraftyPickle
  
Custom flair is amazing because you can personalize any crafty project you want to create. 
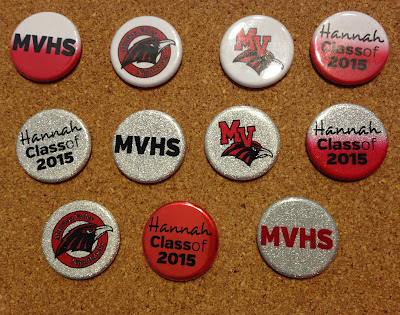
This is a set I ordered for my Daughter Graduation


I previously shared this Amazing card I created for her, but It's worth sharing again. She loved that it was personalized just for her.


For my next project I used some of the custom flair to personalize her Senior portrait and Announcement that I displayed at her Graduation Party.   


And lastly,  I will soon be receiving another personalized set to use when documenting my daughters GRAD Night at Disneyland.  I have not gotten this set yet,  but as soon as I do,  I will share with you my new creations. 
This has got to be the cutest set I have received so far!

So Be sure to pop on over to TheCraftyPickle shop and order your own custom flair to personalize any of your upcoming crafty projects.  And Taniesa is now offering a create your own flair option where you can turn your own art work into a one of a kind button embellishment.


Thanks for stopping by today
Happy Scrappin'
Carrie

Welcome to TheCraftyPickle Blog Hop

Today our creative team will be sharing with you ideas on using Flair, Sequins, Close To My Heart stamps, and more. 
All of us Pickle Gals received the same kit …
so Hop around and see what each of us made with all the fun products in The Crafty Pickle Shop!!!

Prepare to be inspired by our awesome, creative crafty pickle team!


The Blossom papers by CTMH are so perfect for spring.
Also the Butterfly Kisses sequin mix and the Springs Season flair collection are the perfect embellishments for this project.

 I really wanted to use every one of the pretty Blossom papers that we were given so a mini album seemed to be the perfect project.  I created my album using white 5.5 x 4.25 sized envelopes.
The cute sequins and flair add just the right embellishment to each page.
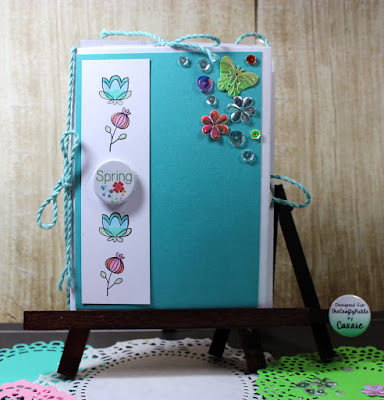
I created a pocket on this page for hidden journaling. I tied some of the CTMH extra thick twine in Glacier at the top of my pull out tag. I also added it behind my spring flair button as an extra pop of color.


 This is one of my favorite pages.  We were given some flip flaps,   from CTMH to work with.  I made mine into a shaker pocket by filling it with the Spring Fling and Butterfly kisses sequin mixes from TheCraftyPickle shop.  

Its fun to see the photo peeking out from under the pocket.
I stamped a row of flowers from the sweet floral stamp we were given along the bottom of the page on the left. Then I added some CTMH adhesive backed sequins from the Oceanside collection.
 I used another Flip Flap on the right hand page.  This allowed for extra photos I wanted to add to my album.
This is the back of the album.  I tied a length of the extra thick twine in a bow along the spine to complete my album.


Make sure you leave a comment on each blog as you hop along for extra chances at winning some
fabulous prizes.  You have until Friday June 12th to comment. The winners will be announced on Monday June 15th!

Thanks for visiting.

If you get lost along
the way here is the order of the hop.

Aster

Carrie ( you are here ) 


Next up is Joann 

Kristin 

Stephanie 
Treasa 


And don’t forget to go
you’re done and comment there too! 
That’s 7 chances to win!

Happy Hopping!

Creating with Alcohol inks

Hi Today I am going to share with you a couple of project life style cards that I created using Alcohol inks. 

These are Adirondack Alcohol inks by Tim Holtz The colors I chose to work with are Wild Plum, Purple Twilight and Watermelon.

First thing I did was get out my splat mat and squirt some color onto the mat. Then I added some blending solution and let it pool on my mat.  Then I just laid my plain white card on top of the ink and let it absorb into the surface of my card. 

 I love the way the 3 colors created an ombre' affect on my card so I decided to continue that look by stamping the same image three times in three different colors of Ranger Dye Ink.  I used the "OH SNAP" stamp set from HoneyBeeScraps 
I love all the sentiments in this set.  They are so personal and sweet. 
 So to complete my cards I matted them onto black card stock and then stamped the sentiment. I also embellished these cards with some black and white twine and some shiny sequins.
 Here is a close up look at my completed cards.
Thanks for stopping by today 
Happy Scrappin'
Carrie